Want to download a torrent and aren’t around your computer? You can use these programs to download and seed torrents directly from your Android device.
uTorrent Remote – https://play.google.com/store/apps/details?id=com.utorrent.web


[vc_row][vc_column width=”2/3″][vc_separator][venera_framed_image content_type=”video” css_animation=”appear” frame_type=”browser” slider_engine=”flexslider” video_link=”https://www.youtube.com/watch?v=17VU2FkfDOM” browser_url=”https://www.youtube.com/watch?v=17VU2FkfDOM”][vc_separator][/vc_column][vc_column width=”1/3″][/vc_column][/vc_row][vc_row][vc_column width=”2/3″][vc_tabs][vc_tab title=”About This Project” tab_id=”1402713028-1-39e9a4-2f888a6d-d37d835b-230e”][vc_column_text]
According to the first law of thermodynamics, heat that flows from a hot object to a cold object is energy. An invention called a Peltier Device takes this energy and converts it to a form of electricity. Peltier devices can be found inside USB drink chiller/heaters. Using these principals, we can create a device that charges a cell phone using the heat from a flame lit lamp.
[/vc_column_text][/vc_tab][vc_tab title=”Parts and Downloads” tab_id=”1402713028-2-39e9a4-2f888a6d-d37d835b-230e”][vc_column_text]
Here’s a main list of parts and approximate prices:
| Part name | Price |
|---|---|
| USB drink chiller | $10-$20 |
| Sterno Cooking Fuel | $10-$20 |
| Single AA Emergency Phone Charger | $10-$20 |
If you want to create a metal stand like I did in the video, here are the parts I used that I found at a local hardware store:
| Part name | Quantity |
|---|---|
| 1/4 Inch Hex Nuts | 8 |
| 1/4 Inch Threaded Metal Rod (7-8 inches) | 4 |
| Electrical box face plates | 2 |
| 1/4 Inch washers | 4 |
| 1/4 Lock washers | 4 |
Although it’s not required, it’s helpful to have a Multimeter so that you can read what voltage is being output.
[/vc_column_text][/vc_tab][vc_tab title=”Assembly” tab_id=”1402753910272-3-88a6d-d37d835b-230e”][vc_column_text]

Peltier Devices
Inside of the USB drink chiller is a peltier device. In it’s current state, it will take electrical impulses and cool down one side of the device while the other side of the device heats up. This is what cools down the drink that is sitting on top of it. But we’ll be using it for the exact opposite of this: we’ll be heating up one side of the peltier device and cooling down the other so that it outputs electricity.
To remove the Peltier device, just unscrew the bottom of the USB drink chiller. You will probably see a bunch of wires and a heat sink. Unscrew the heat sink, if necessary, and underneath it you will find the Peltier device. You should see a black wire and a red wire coming from the Peltier device. Cut these wires being sure to leave at least a few inches attached to the Peltier device.
The metal stand serves multiple purposes. Not only does it provide a nice platform for the Peltier device to sit above the fire, but it helps distribute the heat more evenly across the Peltier device.

Metal Stand Parts
I used two metal electrical box faceplates to increase the thickness and heat distribution. Most faceplates have 4 holes or notches so that you can easily attach screws, or in our case, metal rods. On each threaded metal rod, place one nut and one lock washer. Adjust the nut and lock washer so that they’re about 4-5 inches from the bottom of the metal rod. Then slide the rods through each of the holes on the faceplates so that the faceplates rest on the lockwashers. The faceplates should now be standing on the metal rods about 4-5 inches above the surface of the table. Lastly, place one washer and one nut over the top of each metal rod and screw them down to secure and stabalize the faceplates.

Completed Metal Stand
The set up is pretty simple. With your stand, place the Peltier device on top of the faceplates with the wires safely hanging over the side. Place a lit flame underneath the faceplates so that it starts heating up the Peltier device. For best results, place a heat sink directly on top of the Peltier device to help keep the opposite side cool.
If you have a multimeter, connect it to the two wires of the Peltier device to get a voltage reading.
Since it’s hard to get the Peltier device to output more than 1.5 – 2 volts, we need to use a voltage booster to jump it up to 5 volts, which is the standard voltage required to charge most cell phones. The necessary voltage booster can be found in an Emergency Phone Charger that uses only one AA battery. For mine, it was very simple to unscrew the Emergency Charger and remove the component that boosts the voltage.
Noticing which part of the AA battery (plus or minus) touches which part of the voltage booster will allow you to determine which side is positive and which side is negative. Once that is determined, you can use alligator clips, or soldering equipment to attach the negative wire of the Peltier device to the negative terminal of the voltage booster. Do the same for the positive wire and the positive terminal.
Go ahead and plug your phone into the voltage booster. Once the voltage of the Peltier device reaches 1.5 volts, the phone should start charging.
[/vc_column_text][/vc_tab][vc_tab title=”Important Links” tab_id=”1402753981900-3-108a6d-d37d835b-230e”][vc_column_text]
Help support my channel:
[/vc_column_text][/vc_tab][/vc_tabs][/vc_column][vc_column width=”1/3″][/vc_column][/vc_row]
[vc_row][vc_column width=”2/3″][vc_separator][venera_framed_image content_type=”video” css_animation=”appear” frame_type=”browser” slider_engine=”flexslider” video_link=”https://www.youtube.com/watch?v=RSoWg29wPVc” browser_url=”https://www.youtube.com/watch?v=RSoWg29wPVc”][vc_separator][/vc_column][vc_column width=”1/3″][/vc_column][/vc_row][vc_row][vc_column width=”2/3″][vc_tabs][vc_tab title=”About This Project” tab_id=”1402713028-1-39e9a4-2f88123b-77946048-92947b1b-34c3″][vc_column_text]
A responsive website is a website that changes it’s size and shape so that it can be viewed properly on any device. This is a tutorial that shows you the steps on how to make your own responsive website. Before jumping in, it’s best to watch my beginners guide to HTML and CSS at the links below.
[/vc_column_text][/vc_tab][vc_tab title=”Code” tab_id=”1402753910272-3-8123b-77946048-92947b1b-34c3″][vc_button title=”View sample Site” target=”_blank” icon=”none” size=”btn-huge” href=”http://tinkernut.com/demos/315_responsive/index_responsive.html”][vc_column_text]
A new addition to CSS3 is an element called a Media query, so if you haven’t already, take a look at my CSS tutorial before continuing. A media query allows CSS code to be executed only when certain constraints are met. For instance, you can set the media query to turn the background color of the webpage blue only when the browser size is 480px. So using media queries, you can have several different sets of CSS for your website that can be activated for many different devices or any browser sizes.
Media Queries are elements of CSS3, so they go in the CSS portion of your webpage. Normally the CSS is located in the header using style tags. To create a media query, just add the code below to your CSS:
<style>
@media {
}
</style>
Then after the @media declaration, you can set the parameters you want to target, such as browser size or device size. For browsers, you can use the max-width attribute. For devices, you can use the max-device-width attribute. To set the media parameters in between a maximum value and a minimum value, you can use both the max-width and min-width attributes within the same parameter.
<style>
@media screen and (max-width:480px){
}
</style>
This is an example of a max and min parameter:
<style>
@media screen and (max-width:800px) and (min-width: 480px){
}
</style>
The only thing left to do now is to add your own custom CSS code in between the curly brackets. The CSS can be minimal changes, or you can completely change the design and makeup of the entire site. How much or how little is completely up to you.
<style>
@media screen and (max-width:480px) {
     div.main{
	width:300px;
     }
     div.row2col1{
	font-size:0.5em;
     }
     img{
	width: 250px;
     }
     p.welcome {
	font-size:0.8em;
     }
     p.content {
	font-size:0.7em;
     }

}
</style>
Below is a finished copy of the webpage code used in the video:
<html>
	<head>
		<title>My Data</title>
		<style>
			b{
			color:#000000;
			}
			a{
			text-decoration:none;
			color:grey;
			}
			img{
			display:block;
			margin:auto;
			}
			p.welcome {
				text-align:center;
				font-family: “verdana”;
				font-size:1.875em;
				color:white;
				font-style:bold;
			}
			p.content {
				font-family: “verdana”;
				font-size:1em;
				color:white;
				font-style:italic;
			}
			div.main{
				width:50%;
				margin:auto;
				background:#251111;
			}
			div.row1{
			width:100%;
			}
			div.row2{
			width:100%;
			}
			div.row2col1{
				float:left;
				margin:0;
				padding:1em;
				color:white;
			}
			div.row2col2{
				margin-left:25%;
				background-color:#0A1616;
				padding:1em;
				border:15px solid #251111;
			}
			body{
				background-color:#393635;
				color:white;
			}
			@media screen and (max-width:480px) {
					div.main{
						width:300px;
					}
					div.row2col1{
						font-size:0.5em;
					}
					img{
						width: 250px;
					}
					p.welcome {
						font-size:0.8em;
					}
					p.content {
						font-size:0.7em;
					}

			}
			@media screen and (max-width:800px) and (min-width: 480px) {
					div.main{
						width:600px;
					}
					div.row2col1{
						font-size:0.7em;
					}
					img{
						width: 400px;
					}
					p.welcome {
						font-size:1em;
					}
					p.content {
						font-size:0.8em;
					}

			}
		</style>
	</head>
	<body>
		<div class="main">
			<div class="row1">
				<img src="logo.jpg"/>
			</div>
			<div class="row2">
				<div class="row2col1">
					Navigation
					<hr align="left" width=75%>
						<ul>
							<li><a href="about.html">About Me</a></li>
							<li><a href="http://www.google.com">Google</a></li>
						</ul>
				</div>
				<div class="row2col2"><p class="welcome" >Welcome to my data page!</p><p class="content" >This page is a work in progress that will eventually show places for data input, as well as data recall. Check back here for updates and more information! Thanks for visiting!</p>
				</div>
			</div>

		</div>

	</body>
</html>
[/vc_column_text][/vc_tab][vc_tab title=”Important Links” tab_id=”1402753981900-3-10123b-77946048-92947b1b-34c3″][vc_column_text]
Important Links:
Help support my channel:
[/vc_column_text][/vc_tab][/vc_tabs][/vc_column][vc_column width=”1/3″][/vc_column][/vc_row]

In part 13 of the Partner Project, we discuss different options for making your website or Youtube channel mobile by showing you paid and free options for making mobile apps for your content.
For those interested in coding your own apps from scratch, here’s the links to the individual developer portals for each phone:
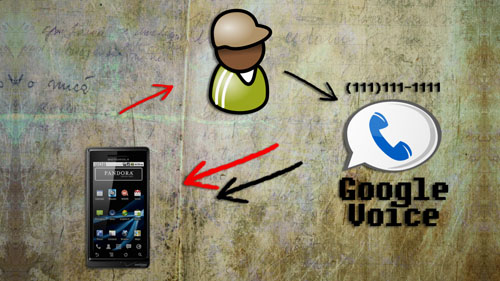

http://voice.google.com
http://www.sipgate.com
http://www.voxox.com
http://www.ipkall.com
http://www.appbrain.com/app/sipdroid/org.sipdroid.sipua
http://www.cyrket.com/p/android/com.xinlu.gvdial/
Instructions for iPhone:
http://www.hutsby.net/2010/02/howto-iphone-sip-isipsimple-and-sipgate.html
Proxy Instructions:
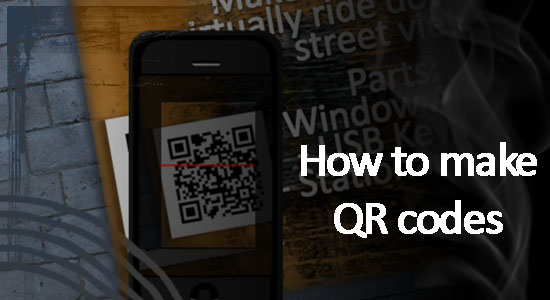
Links used in this video:
BeQRious – http://www.beqrious.com/generator
Desktop QR code scanner – http://www.tinkernut.com/demos/284_qr_codes/QRreader.air
I-nigma – http://www.i-nigma.com/SupportedDevices.html
Spotlike – http://spotlike.com
Paperlinks – http://www.paperlinks.com
Google Generator – http://www.goo.gl

Description:
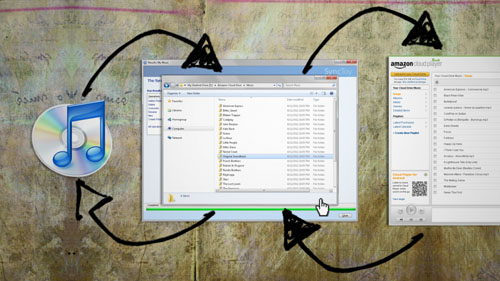
Last week Amazon announced their new cloud player for music. But many of us already use and store our files with iTunes. This video shows you how you can sync your music to both programs so that when you purchase a song from one, it automatically syncs with the other.
Links used in this video:
http://www.amazon.com
http://www.gladinet.com/p/download_starter_direct.htm
https://www.microsoft.com/downloads/en/details.aspx?familyid=C26EFA36-98E0-4EE9-A7C5-98D0592D8C52&displaylang=en
If you want to repurpose an old Windows Mobile Phone that you may have lying around, you can convert it to an Android phone in a few simple steps.
Links:
Android Eclair for HTC Vogue – http://www.tinkernut.com/demos/269_dualboot/android_eclair_vogue.zip
Gen.YDualBoot – http://forum.xda-developers.com/showthread.php?t=623792
Popular Android Ports:
NOTE- If your phone isn’t listed, just google your phone adding “android” after it.
HTC Touch – http://sourceforge.net/apps/trac/androidhtc/
iPhone – http://www.redmondpie.com/install-android-on-iphone-3g-2g-with-iphodroid
Samsung i900, i910, i780, i907- http://andromnia.net/wiki/home
In this episode, we discover how to print to your home printer from anywhere using your mobile device, including most smartphones and the iPad.
Google Cloud Print: http://code.google.com/apis/cloudprint/docs/overview.html
Dropbox: http://www.dropbox.com
Droppedbox (Windows Mobile): http://forum.xda-developers.com/showthread.php?t=687534
E-print (for Windows): http://img.labnol.org/files/e-print.zip
E-print (for Linux): http://www.labnol.org/software/print-files-on-linux/17841/
E-print (for Mac): http://www.labnol.org/tech/print-files-on-remote-mac/17838/