[vc_row][vc_column width=”2/3″][vc_separator][venera_framed_image content_type=”video” css_animation=”appear” frame_type=”browser” slider_engine=”flexslider” video_link=”https://www.youtube.com/watch?v=17VU2FkfDOM” browser_url=”https://www.youtube.com/watch?v=17VU2FkfDOM”][vc_separator][/vc_column][vc_column width=”1/3″][/vc_column][/vc_row][vc_row][vc_column width=”2/3″][vc_tabs][vc_tab title=”About This Project” tab_id=”1402713028-1-39e9a4-2f888a6d-d37d835b-230e”][vc_column_text]
According to the first law of thermodynamics, heat that flows from a hot object to a cold object is energy. An invention called a Peltier Device takes this energy and converts it to a form of electricity. Peltier devices can be found inside USB drink chiller/heaters. Using these principals, we can create a device that charges a cell phone using the heat from a flame lit lamp.
[/vc_column_text][/vc_tab][vc_tab title=”Parts and Downloads” tab_id=”1402713028-2-39e9a4-2f888a6d-d37d835b-230e”][vc_column_text]
Parts List
Here’s a main list of parts and approximate prices:
| Part name | Price |
|---|---|
| USB drink chiller | $10-$20 |
| Sterno Cooking Fuel | $10-$20 |
| Single AA Emergency Phone Charger | $10-$20 |
If you want to create a metal stand like I did in the video, here are the parts I used that I found at a local hardware store:
| Part name | Quantity |
|---|---|
| 1/4 Inch Hex Nuts | 8 |
| 1/4 Inch Threaded Metal Rod (7-8 inches) | 4 |
| Electrical box face plates | 2 |
| 1/4 Inch washers | 4 |
| 1/4 Lock washers | 4 |
Although it’s not required, it’s helpful to have a Multimeter so that you can read what voltage is being output.
[/vc_column_text][/vc_tab][vc_tab title=”Assembly” tab_id=”1402753910272-3-88a6d-d37d835b-230e”][vc_column_text]
Obtaining the Peltier Device

Peltier Devices
Inside of the USB drink chiller is a peltier device. In it’s current state, it will take electrical impulses and cool down one side of the device while the other side of the device heats up. This is what cools down the drink that is sitting on top of it. But we’ll be using it for the exact opposite of this: we’ll be heating up one side of the peltier device and cooling down the other so that it outputs electricity.
To remove the Peltier device, just unscrew the bottom of the USB drink chiller. You will probably see a bunch of wires and a heat sink. Unscrew the heat sink, if necessary, and underneath it you will find the Peltier device. You should see a black wire and a red wire coming from the Peltier device. Cut these wires being sure to leave at least a few inches attached to the Peltier device.
Constructing the stand
The metal stand serves multiple purposes. Not only does it provide a nice platform for the Peltier device to sit above the fire, but it helps distribute the heat more evenly across the Peltier device.

Metal Stand Parts
I used two metal electrical box faceplates to increase the thickness and heat distribution. Most faceplates have 4 holes or notches so that you can easily attach screws, or in our case, metal rods. On each threaded metal rod, place one nut and one lock washer. Adjust the nut and lock washer so that they’re about 4-5 inches from the bottom of the metal rod. Then slide the rods through each of the holes on the faceplates so that the faceplates rest on the lockwashers. The faceplates should now be standing on the metal rods about 4-5 inches above the surface of the table. Lastly, place one washer and one nut over the top of each metal rod and screw them down to secure and stabalize the faceplates.

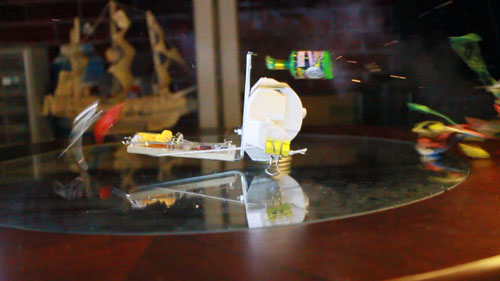
Completed Metal Stand
The Set Up
The set up is pretty simple. With your stand, place the Peltier device on top of the faceplates with the wires safely hanging over the side. Place a lit flame underneath the faceplates so that it starts heating up the Peltier device. For best results, place a heat sink directly on top of the Peltier device to help keep the opposite side cool.
If you have a multimeter, connect it to the two wires of the Peltier device to get a voltage reading.
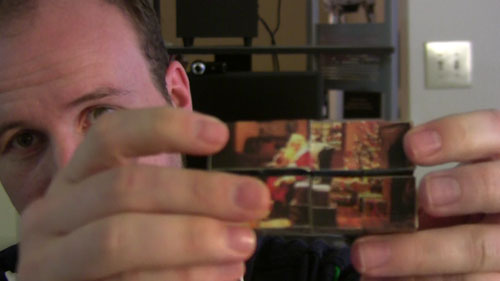
Adding the Voltage Boost
Since it’s hard to get the Peltier device to output more than 1.5 – 2 volts, we need to use a voltage booster to jump it up to 5 volts, which is the standard voltage required to charge most cell phones. The necessary voltage booster can be found in an Emergency Phone Charger that uses only one AA battery. For mine, it was very simple to unscrew the Emergency Charger and remove the component that boosts the voltage.
Noticing which part of the AA battery (plus or minus) touches which part of the voltage booster will allow you to determine which side is positive and which side is negative. Once that is determined, you can use alligator clips, or soldering equipment to attach the negative wire of the Peltier device to the negative terminal of the voltage booster. Do the same for the positive wire and the positive terminal.
Go ahead and plug your phone into the voltage booster. Once the voltage of the Peltier device reaches 1.5 volts, the phone should start charging.
[/vc_column_text][/vc_tab][vc_tab title=”Important Links” tab_id=”1402753981900-3-108a6d-d37d835b-230e”][vc_column_text]
Help support my channel:
- http://www.patreon.com/tinkernut
- Follow Tinkernut! Google +
[/vc_column_text][/vc_tab][/vc_tabs][/vc_column][vc_column width=”1/3″][/vc_column][/vc_row]