Learn how to use an arduino to control objects using physical input, such as a button. Below are links to more Arduino beginner tutorials:
Arduino Playlist –
Arduino Beginners Guide – http://www.youtube.com/watch?v=PWKYYJu4yVw

Learn how to use an arduino to control objects using physical input, such as a button. Below are links to more Arduino beginner tutorials:
Arduino Playlist –
Arduino Beginners Guide – http://www.youtube.com/watch?v=PWKYYJu4yVw

[vc_row][vc_column width=”2/3″][vc_separator][venera_framed_image content_type=”video” css_animation=”appear” frame_type=”browser” slider_engine=”flexslider” video_link=”https://www.youtube.com/watch?v=3-0atIGgsXE” browser_url=”https://www.youtube.com/watch?v=3-0atIGgsXE”][vc_separator][/vc_column][vc_column width=”1/3″][/vc_column][/vc_row][vc_row][vc_column width=”2/3″][vc_tabs][vc_tab title=”About This Project” tab_id=”1402713028-1-395270-7c72″][vc_column_text]
My favorite first-person shooter game growing up was Counter-Strike. Now this nostalgic game has been portablized. So in this episode, I show you how to install a Counter-strike server on an Android device.
[/vc_column_text][/vc_tab][vc_tab title=”Installation” tab_id=”1402713028-2-395270-7c72″][vc_column_text]
The portable Counter-Strike initiative isn’t backed by the original distributors of the game, so it isn’t supported by Valve or the original Counter-Strike creators. So to grab the unsupported portable version of the game, you need to go to CS-portable.com. Across the top of the menu, you’ll see links to download the portable version, or to even play online. Keep in mind, though, that the online version can’t network with the portable versions.

Counter-Strike Logo
Installing CS portable on iOS devices is considerably more difficult than Android devices because of Apple’s strict App approval procedures. But here’s the basic procedure:
For Android devices, the process is much simpler.
Now you should just be able to open it up like a regular App and start playing!
[/vc_column_text][/vc_tab][vc_tab title=”Important Links” tab_id=”1402713403419-2-15270-7c72″][vc_column_text]
Help support my channel: http://www.patreon.com/tinkernut Follow Tinkernut! Google + Facebook Twitter
[/vc_column_text][/vc_tab][/vc_tabs][/vc_column][vc_column width=”1/3″][/vc_column][/vc_row]

[vc_row][vc_column width=”2/3″][vc_separator][venera_framed_image content_type=”video” css_animation=”appear” frame_type=”browser” slider_engine=”flexslider” video_link=”https://www.youtube.com/watch?v=WgcNBjIJNYs” browser_url=”https://www.youtube.com/watch?v=WgcNBjIJNYs”][vc_separator][/vc_column][vc_column width=”1/3″][/vc_column][/vc_row][vc_row][vc_column width=”2/3″][vc_tabs][vc_tab title=”About This Project” tab_id=”1402713028-1-39e9a4-2f88123b-77946048-9294ef23-7cf7″][vc_column_text]
The Raspberry Pi is an amazing $35 mini-computer. And in this video, I’ll show you how to set it up as a fully functioning web server.
[/vc_column_text][/vc_tab][vc_tab title=”Code” tab_id=”1402753910272-3-8123b-77946048-9294ef23-7cf7″][vc_column_text]
The Raspberry Pi is a revolutionary mini-computing system that is super cheap. It’s based on the ARM processor, and can be powered through USB (5v) and has all of the standard functionality of regular computers.

Raspberry Pi
There are two types of Raspberry Pi Models: Model A ($25) and Model B ($35). Both models have 256mb of RAM, HDMI and Composite video connections, audio connections, USB power input, USB port output, and SD card input. Model B adds an ethernet port (for network connections) and an extra USB port, which is what makes it more expensive.
Since the Raspberry Pi is in such high demand, attaining one is kind of difficult. At the time of writing this wiki, you can only sign up to be notified when more Raspberry Pi devices are available. You can sign up at Alliedelec (North America only), RS-Online (everyone), or Element14 (everyone).

Raspberry Pi Box
When you first receive a Raspberry Pi, it’s basically just a circuit board in a box. Obviously to run it as a computer, you need some necessary hardware peripherals first. Here’s the list of parts you will need to run it for the first time:
Before you can use the Raspberry pi, you have to install the Raspberry Pi Operating System on to the SD card. Don’t worry, it’s not as difficult as it sounds. If you have Windows (you can find Linux and Mac instructions here, there are only 2 things you need to download

Win32DiskImager
Unzip the Debian Squeeze file that you downloaded. It should produce an ISO file. Now insert your SD card into the computer that you downloaded the files to. Open up Win32DiskImager and for the Device, choose the drive letter of you your SD card. Then click on the folder icon to browser to the Debian Squeeze ISO file that you downloaded. Lastly, click “Write” to write the image file to your SD card. It can take a few minutes to write the files.
Once the SD card has been prepped, stick it into your Raspberry Pi. Now you can start plugging in all of your other hardware peripherals, making sure to plug in the micro-usb cable last, since it provides the power.

Raspberry Pi Connections
Once power has been provided, you should start seeing the loading screen for the Raspberry Pi OS on your monitor. The first time, it will take a few minutes to completely load. All other times, it should load pretty fast. You’ll know when it’s through loading because you will see a line that says “raspberry pi login:”. The defaul login name is pi. And the default password is raspberry.
You should now be at a line that says pi@raspberrypi:~$. This means you can start entering in commands. For those of you that are used to a desktop environment, I know this isn’t what you had in mind. So if you prefer a desktop environment, you can type
startx
This will load the desktop environment. From here you can plug in a mouse and use it like you would a normal computer GUI.
It’s good practice to update the software and software repositories when you first set up your Raspberry Pi. It’s also important to update the system clock via the internet, since the Raspberry Pi does not have real-time clock. So here’s a list of initial commands to get your system updated:
Configure Time
sudo dpkg-reconfigure tzdata
Update software packages
sudo apt-get update
Update Debian
sudo apt-get upgrade
NOTE: If you are running the latest Raspbian hard float release, this update tool will prevent your pi from booting. Only use this if you have Debian squeeze
To keep the Raspberry Pi firmware up-to-date, you have to install a program called Hexxeh’s RPI update tool through Git-hub. Here’s the process
Install certificate authority certificates
sudo apt-get install ca-certificates
Install Git (required to run Hexxeh)
sudo apt-get install git-core
Download Hexxeh’s RPI update tool
sudo wget http://goo.gl/1BOfJ -O /usr/bin/rpi-update && chmod +x /usr/bin/rpi-update
Update the firmware
sudo rpi-update
Reboot
sudo shutdown -r now
You will not have to do this step if you have downloaded Raspbian or Debian Wheezy – SSH should be enabled by default. If it is not enabled, follow these instructions:
To start out, type this then hit enter:
sudo raspi-config
You will now see a screen with a few options. Use the arrows keys to navigate to the SSH option. This will take you to another screen that asks you “Would you like the SSH server enabled or disabled?” Choose the <Enable> option with your arrow keys and hit enter. Select okay, and hit enter. Now, back at the raspi-config screen, navigate to <Finish> and hit enter. You should now be able to use SSH with your Pi!
An ideal setup of Raspberry Pi would be to control it remotely. This can be done through an SSH connection, but by default SSH connections are disabled. Before we enable it, the screen should have the IP address of the Raspberry Pi listed (ex. 192.168.2.37). Write down that IP address as we will need it for the SSH connection. Ok, To enable SSH, simply run this command:
sudo mv /boot/boot_enable_ssh.rc /boot/boot.rc

sudo shutdown -r now
Once the Raspberry Pi reboots, you can now unplug the keyboard and the monitor connections from the Raspberry Pi, as we will no longer need them for the rest of this tutorial.

Putty Window
On a remote Windows machine, in order to connect to the Raspberry Pi, you will need to download Putty, a Windows SSH client. Once it’s downloaded, start it up and type in the Raspberry Pi’s IP address that you wrote down earlier in the Host Name (or IP address) field. Then just click “open”. If it’s your first time connecting, Putty will ask you to store a key authentication, so click “Yes”. Now you should see a login screen where you can log in using your Raspberry Pi login credentials.
For obvious security reasons, it’s recommended to change the default password to a secure password of your own. After you have logged into your pi account, to change the password, type:
sudo passwd pi
Now you should be prompted to enter in a new password. Once you’ve typed in your password and hit enter, you’ll then be prompted to repeat your password. After typing it in again and hitting enter, you will have successfully changed your password.
In order to use the Raspberry Pi as a web server, you have to install all the necessary server software components. If you just want a simple HTML server, you can just install that server software (Apache or Cherokee). If you want MySQL and PHP support on your server, you have to install those components separately as well.
Apache server software is the most widely used server software. However, it is a little bit more bloated than the Cherokee server software. If you want a more traditional experience, you can install Apache. Otherwise, you can skip to the Cherokee Server section and install Cherokee. Here’s how to install Apache:
Install Apache with PHP
sudo apt-get install apache2 php5 libapache2-mod-php5
When it asks if you want to continue, press y
Resolve installation error
sudo groupadd www-data

sudo usermod -g www-data www-data
Restart Apache
sudo service apache2 restart
Now if you open up a web browser and type in your Raspberry Pi’s IP address, you should be pull up a the test page for your server!
If you want a lighter web server, then Cherokee is better than Apache. And considering the limited resources of the Raspberry Pi, lighter is better. Here’s how to install it:
Prevent install errors
sudo addgroup www-data
Install Cherokee
sudo apt-get install cherokee
Install PHP
sudo apt-get install php5-cgi
Edit the PHP config file
sudo nano /etc/php5/cgi/php.ini
Hit ctrl+W and search for cgi.fix_pathinfo=1, remove the ; form the front of the line
Hit ctrl+X to exit, y to save and enter to confirm
Restart Cherokee
/etc/init.d/cherokee restart
Now if you open up a web browser and type in your Raspberry Pi’s IP address, you should be pull up a the test page for your server!
Installing MySQL is pretty simple. You basically just install these packages:
sudo apt-get install mysql-server mysql-client php5-mysql
When it asks if you want to continue, press y
It will eventually prompt you for a new root user password, so create a strong password and continue until the installation is through.
FTP is not only a great way to remotely add/change files on your website, but it’s also a great way to transfer files to your Raspberry Pi. This is important for installing PHP MyAdmin in the next step. These instructions are for the Apache server install.
Take ownership of the WWW Apache folder
sudo chown -R pi /var/www
Install VSFTP
sudo apt-get install vsftpd
Edit the FTP configuration file
sudo nano /etc/vsftpd.conf
Hit ctrl+W and search for anonymous_enable=YES, and change it to anonymous_enable=NO
Remove the # from in front of local_enable=YES
Remove the # from in front of write_enable=YES
Skip to the bottom of the file and add force_dot_files=YES
Hit ctrl+X to exit, y to save and enter to confirm
Restart VSFTP
sudo service vsftpd restart
Change the root users password
sudo passwd root
Create a new password and then exit out of Putty
exit
Restart Putty and log in as root with the new password
Edit the password configuration file
sudo nano /etc/passwd
Find the line pi:x;1000:1000:Raspberry Pi User,,,:home/pi:/bin/bash and add a # sign to the beginning of it.
Hit ctrl+X to exit, y to save and enter to confirm
Add the pi user as a mod and exit out of the Putty
sudo usermod -d /var/www pi

exit
Restart Putty and log in as pi
Give mod rights to root and exit
sudo usermod -L root

exit
Now your FTP server should be up and running. You can test it out by logging into it with any FTP client such as FileZilla or WinSCP. Use the IP address from your Raspberry Pi that you wrote down earlier, port 22, your Raspberry Pi username (pi), and your password.
To better manage MySQL databases, it’s often preferred to use the PHP MyAdmin program. So here’s how you can install it:
To access PHP MyAdmin, in a web browser type in your Raspberry Pi’s IP address and then add /admin to the end of it (ex. 192.168.2.37/admin). Then you can log in using the root username and password that you created for your MySQL installation.
[/vc_column_text][/vc_tab][vc_tab title=”Important Links” tab_id=”1402753981900-3-10123b-77946048-9294ef23-7cf7″][vc_column_text]
Raspberry Pi – http://www.raspberrypi.org
Raspberry Pi Disk Image – http://www.raspberrypi.org/downloads
Win32DiskImager – https://launchpad.net/win32-image-writer
Putty – http://www.chiark.greenend.org.uk/~sgtatham/putty/
Website Tutorials – http://www.youtube.com/playlist?list=PL6291918FE7103470
Port Forwarding Tutorial – http://www.youtube.com/watch?v=1DSDbvtVIaA
Help support my channel: http://www.patreon.com/tinkernut Follow Tinkernut! Google + Facebook Twitter
[/vc_column_text][/vc_tab][/vc_tabs][/vc_column][vc_column width=”1/3″][/vc_column][/vc_row]


[vc_row][vc_column width=”2/3″][vc_separator][venera_framed_image content_type=”video” css_animation=”appear” frame_type=”browser” slider_engine=”flexslider” video_link=”https://www.youtube.com/watch?v=PWKYYJu4yVw” browser_url=”https://www.youtube.com/watch?v=PWKYYJu4yVw”][vc_separator][/vc_column][vc_column width=”1/3″][/vc_column][/vc_row][vc_row][vc_column width=”2/3″][vc_tabs][vc_tab title=”About This Project” tab_id=”1402713028-1-39e9a4-2f88123b-77946048-92948c2b-0e6b”][vc_column_text]
The easiest way to make and control your own electronics is through a device called an “Arduino”. This video shows you the basics of getting started with it.
[/vc_column_text][/vc_tab][vc_tab title=”Parts and Code” tab_id=”1402753910272-3-8123b-77946048-92948c2b-0e6b”][vc_button title=”Download The Arduino Software” target=”_blank” icon=”none” size=”btn-huge” href=”http://arduino.cc/en/Main/Software”][vc_column_text]
Arduino’s can be purchased online at varying prices. Amazon or Ebay will vary greatly in prices. The price also depends on the version of Arduino that you purchase. The current version is the Uno and the older version is the Duemilanove. Other types of Arduino exist as well, such as an Arduino that you can build yourself, Arduino Nano, Lilypad, Arduino BT and a lot more.
| Version | Price |
|---|---|
| Arduino Uno | $29.96 |
You can download the Arduino software from here. It’s available for Windows, Mac and Linux. It downloads in a zip file, so you will need archiving software such as 7-zip to unzip it. Then you will need to just click on the “Arduino” program icon to launch the program.

Arduino Uno board
The first thing you want to do is check to make sure the program is set to match the Arduino board that you are using. You can find out the type of board you have by looking on either the top or the bottom of the board. Then go to Tools>Boards from the menu and select your board.
Also you need to make sure the correct serial port is selected. This section is also accessed from the Tools menu. If the option is greyed out, then that means your Arduino board is not connected properly. You can find some common troubleshooting techniques below. For most new computers that only have one Arduino connected to them, there will most likely only be one serial port to select.
The Arduino uses C/C++ programming language, so if you’re familiar with those languages you’re already way ahead of the curve. The Arduino program basically allows you to write a program, upload it to your Arduino device and save it for later use. The programs tell the Arduino what to do, how to control things, what information to retrieve, etc. You can find lots of sample programs by going to File > Examples. The sample program used in the video can also be found at File > Examples > 01.Basics > Blink. The final code can be seen here:
int led = 13;

void setup() {
  pinMode(led, OUTPUT);
}

void loop() {
  digitalWrite(led, HIGH);
  delay(1000);
  digitalWrite(led, LOW);
  delay(1000);
}
As you become more advanced with creating programs and adding devices, you will need to start using different Arduino libraries. The make is easy to extend the functionality of the Arduino in amazing ways.
The sky is the limit when it comes to what can be connected to the Arduino. But you must know how to connect them. There are lots of input/output ports on the Arduino. Some are analog and some are digital. Please refer to the online documentation to know which pins are best for your project.
The Arduino runs off of 5 volts, so whenever it’s connected to your computer via USB, it can power itself. If you wanted to run it separately from your computer, then you would need to supply it with 5 volts via a battery pack or by wiring 5 volts of current through the Arduino’s power pins.
This generally means that your Arduino board either is not connected properly or not installed properly. Check your USB cord and the connection to make sure that it is connected properly. On Windows 7 and some Vista machines, you will need to install the drivers for the Arduino before it works. To do this, open up your Device Manager (Start>Search>”Device Manager”) and look for any device that has an exclamation point or question mark beside it. Right click on that device and choose “Update Driver”. Then browse to the “drivers” folder in your Arduino installation folder. After clicking next, it should install the drivers.
There three main reasons this will happen:
Please check the previous troubleshooting questions to see if they resolve this problem before continuing. If it still is not working, then the LED is not connected properly. Make sure the positive leg (the longer LED leg) is connected to port 13 and the negative leg (on the same side as the flat part of the LED) is connected to GND. It will not work in any other ports due to port 13 being the only one that has a built-in resistor.
[/vc_column_text][/vc_tab][vc_tab title=”Important Links” tab_id=”1402753981900-3-10123b-77946048-92948c2b-0e6b”][vc_column_text] Help support my channel: http://www.patreon.com/tinkernut Follow Tinkernut! Google + Facebook Twitter [/vc_column_text][/vc_tab][/vc_tabs][/vc_column][vc_column width=”1/3″][/vc_column][/vc_row]


[vc_row][vc_column width=”2/3″][vc_separator][venera_framed_image content_type=”video” css_animation=”appear” frame_type=”browser” slider_engine=”flexslider” video_link=”https://www.youtube.com/watch?v=17VU2FkfDOM” browser_url=”https://www.youtube.com/watch?v=17VU2FkfDOM”][vc_separator][/vc_column][vc_column width=”1/3″][/vc_column][/vc_row][vc_row][vc_column width=”2/3″][vc_tabs][vc_tab title=”About This Project” tab_id=”1402713028-1-39e9a4-2f888a6d-d37d835b-230e”][vc_column_text]
According to the first law of thermodynamics, heat that flows from a hot object to a cold object is energy. An invention called a Peltier Device takes this energy and converts it to a form of electricity. Peltier devices can be found inside USB drink chiller/heaters. Using these principals, we can create a device that charges a cell phone using the heat from a flame lit lamp.
[/vc_column_text][/vc_tab][vc_tab title=”Parts and Downloads” tab_id=”1402713028-2-39e9a4-2f888a6d-d37d835b-230e”][vc_column_text]
Here’s a main list of parts and approximate prices:
| Part name | Price |
|---|---|
| USB drink chiller | $10-$20 |
| Sterno Cooking Fuel | $10-$20 |
| Single AA Emergency Phone Charger | $10-$20 |
If you want to create a metal stand like I did in the video, here are the parts I used that I found at a local hardware store:
| Part name | Quantity |
|---|---|
| 1/4 Inch Hex Nuts | 8 |
| 1/4 Inch Threaded Metal Rod (7-8 inches) | 4 |
| Electrical box face plates | 2 |
| 1/4 Inch washers | 4 |
| 1/4 Lock washers | 4 |
Although it’s not required, it’s helpful to have a Multimeter so that you can read what voltage is being output.
[/vc_column_text][/vc_tab][vc_tab title=”Assembly” tab_id=”1402753910272-3-88a6d-d37d835b-230e”][vc_column_text]

Peltier Devices
Inside of the USB drink chiller is a peltier device. In it’s current state, it will take electrical impulses and cool down one side of the device while the other side of the device heats up. This is what cools down the drink that is sitting on top of it. But we’ll be using it for the exact opposite of this: we’ll be heating up one side of the peltier device and cooling down the other so that it outputs electricity.
To remove the Peltier device, just unscrew the bottom of the USB drink chiller. You will probably see a bunch of wires and a heat sink. Unscrew the heat sink, if necessary, and underneath it you will find the Peltier device. You should see a black wire and a red wire coming from the Peltier device. Cut these wires being sure to leave at least a few inches attached to the Peltier device.
The metal stand serves multiple purposes. Not only does it provide a nice platform for the Peltier device to sit above the fire, but it helps distribute the heat more evenly across the Peltier device.

Metal Stand Parts
I used two metal electrical box faceplates to increase the thickness and heat distribution. Most faceplates have 4 holes or notches so that you can easily attach screws, or in our case, metal rods. On each threaded metal rod, place one nut and one lock washer. Adjust the nut and lock washer so that they’re about 4-5 inches from the bottom of the metal rod. Then slide the rods through each of the holes on the faceplates so that the faceplates rest on the lockwashers. The faceplates should now be standing on the metal rods about 4-5 inches above the surface of the table. Lastly, place one washer and one nut over the top of each metal rod and screw them down to secure and stabalize the faceplates.

Completed Metal Stand
The set up is pretty simple. With your stand, place the Peltier device on top of the faceplates with the wires safely hanging over the side. Place a lit flame underneath the faceplates so that it starts heating up the Peltier device. For best results, place a heat sink directly on top of the Peltier device to help keep the opposite side cool.
If you have a multimeter, connect it to the two wires of the Peltier device to get a voltage reading.
Since it’s hard to get the Peltier device to output more than 1.5 – 2 volts, we need to use a voltage booster to jump it up to 5 volts, which is the standard voltage required to charge most cell phones. The necessary voltage booster can be found in an Emergency Phone Charger that uses only one AA battery. For mine, it was very simple to unscrew the Emergency Charger and remove the component that boosts the voltage.
Noticing which part of the AA battery (plus or minus) touches which part of the voltage booster will allow you to determine which side is positive and which side is negative. Once that is determined, you can use alligator clips, or soldering equipment to attach the negative wire of the Peltier device to the negative terminal of the voltage booster. Do the same for the positive wire and the positive terminal.
Go ahead and plug your phone into the voltage booster. Once the voltage of the Peltier device reaches 1.5 volts, the phone should start charging.
[/vc_column_text][/vc_tab][vc_tab title=”Important Links” tab_id=”1402753981900-3-108a6d-d37d835b-230e”][vc_column_text]
Help support my channel:
[/vc_column_text][/vc_tab][/vc_tabs][/vc_column][vc_column width=”1/3″][/vc_column][/vc_row]

[vc_row][vc_column width=”2/3″][vc_separator][venera_framed_image content_type=”video” css_animation=”appear” frame_type=”browser” slider_engine=”flexslider” video_link=”https://www.youtube.com/watch?v=RSoWg29wPVc” browser_url=”https://www.youtube.com/watch?v=RSoWg29wPVc”][vc_separator][/vc_column][vc_column width=”1/3″][/vc_column][/vc_row][vc_row][vc_column width=”2/3″][vc_tabs][vc_tab title=”About This Project” tab_id=”1402713028-1-39e9a4-2f88123b-77946048-92947b1b-34c3″][vc_column_text]
A responsive website is a website that changes it’s size and shape so that it can be viewed properly on any device. This is a tutorial that shows you the steps on how to make your own responsive website. Before jumping in, it’s best to watch my beginners guide to HTML and CSS at the links below.
[/vc_column_text][/vc_tab][vc_tab title=”Code” tab_id=”1402753910272-3-8123b-77946048-92947b1b-34c3″][vc_button title=”View sample Site” target=”_blank” icon=”none” size=”btn-huge” href=”http://tinkernut.com/demos/315_responsive/index_responsive.html”][vc_column_text]
A new addition to CSS3 is an element called a Media query, so if you haven’t already, take a look at my CSS tutorial before continuing. A media query allows CSS code to be executed only when certain constraints are met. For instance, you can set the media query to turn the background color of the webpage blue only when the browser size is 480px. So using media queries, you can have several different sets of CSS for your website that can be activated for many different devices or any browser sizes.
Media Queries are elements of CSS3, so they go in the CSS portion of your webpage. Normally the CSS is located in the header using style tags. To create a media query, just add the code below to your CSS:
<style>
@media {
}
</style>
Then after the @media declaration, you can set the parameters you want to target, such as browser size or device size. For browsers, you can use the max-width attribute. For devices, you can use the max-device-width attribute. To set the media parameters in between a maximum value and a minimum value, you can use both the max-width and min-width attributes within the same parameter.
<style>
@media screen and (max-width:480px){
}
</style>
This is an example of a max and min parameter:
<style>
@media screen and (max-width:800px) and (min-width: 480px){
}
</style>
The only thing left to do now is to add your own custom CSS code in between the curly brackets. The CSS can be minimal changes, or you can completely change the design and makeup of the entire site. How much or how little is completely up to you.
<style>
@media screen and (max-width:480px) {
     div.main{
	width:300px;
     }
     div.row2col1{
	font-size:0.5em;
     }
     img{
	width: 250px;
     }
     p.welcome {
	font-size:0.8em;
     }
     p.content {
	font-size:0.7em;
     }

}
</style>
Below is a finished copy of the webpage code used in the video:
<html>
	<head>
		<title>My Data</title>
		<style>
			b{
			color:#000000;
			}
			a{
			text-decoration:none;
			color:grey;
			}
			img{
			display:block;
			margin:auto;
			}
			p.welcome {
				text-align:center;
				font-family: “verdana”;
				font-size:1.875em;
				color:white;
				font-style:bold;
			}
			p.content {
				font-family: “verdana”;
				font-size:1em;
				color:white;
				font-style:italic;
			}
			div.main{
				width:50%;
				margin:auto;
				background:#251111;
			}
			div.row1{
			width:100%;
			}
			div.row2{
			width:100%;
			}
			div.row2col1{
				float:left;
				margin:0;
				padding:1em;
				color:white;
			}
			div.row2col2{
				margin-left:25%;
				background-color:#0A1616;
				padding:1em;
				border:15px solid #251111;
			}
			body{
				background-color:#393635;
				color:white;
			}
			@media screen and (max-width:480px) {
					div.main{
						width:300px;
					}
					div.row2col1{
						font-size:0.5em;
					}
					img{
						width: 250px;
					}
					p.welcome {
						font-size:0.8em;
					}
					p.content {
						font-size:0.7em;
					}

			}
			@media screen and (max-width:800px) and (min-width: 480px) {
					div.main{
						width:600px;
					}
					div.row2col1{
						font-size:0.7em;
					}
					img{
						width: 400px;
					}
					p.welcome {
						font-size:1em;
					}
					p.content {
						font-size:0.8em;
					}

			}
		</style>
	</head>
	<body>
		<div class="main">
			<div class="row1">
				<img src="logo.jpg"/>
			</div>
			<div class="row2">
				<div class="row2col1">
					Navigation
					<hr align="left" width=75%>
						<ul>
							<li><a href="about.html">About Me</a></li>
							<li><a href="http://www.google.com">Google</a></li>
						</ul>
				</div>
				<div class="row2col2"><p class="welcome" >Welcome to my data page!</p><p class="content" >This page is a work in progress that will eventually show places for data input, as well as data recall. Check back here for updates and more information! Thanks for visiting!</p>
				</div>
			</div>

		</div>

	</body>
</html>
[/vc_column_text][/vc_tab][vc_tab title=”Important Links” tab_id=”1402753981900-3-10123b-77946048-92947b1b-34c3″][vc_column_text]
Important Links:
Help support my channel:
[/vc_column_text][/vc_tab][/vc_tabs][/vc_column][vc_column width=”1/3″][/vc_column][/vc_row]
Links used in this video:
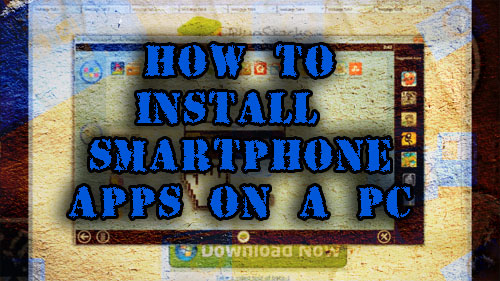
Bluestacks – http://bluestacks.com
Android Market apk – http://forum.xda-developers.com/showthread.php?t=1298332
Increase storage size – http://forum.xda-developers.com/showpost.php?p=18432723&postcount=33

Links used in this video:
www.fotoforensics.com