Tinkernut Labs


  • HTML5 Photo Booth

    March 19, 2013 // davisde // Programming Tips Tags: html5, photo, picture, programming 3 Responses


    [vc_row][vc_column width=”2/3″][vc_separator][venera_framed_image content_type=”video” css_animation=”appear” frame_type=”browser” slider_engine=”flexslider” video_link=”https://www.youtube.com/watch?v=2sXkl3rR-yc” browser_url=”https://www.youtube.com/watch?v=2sXkl3rR-yc”][vc_separator][/vc_column][vc_column width=”1/3″][/vc_column][/vc_row][vc_row][vc_column width=”2/3″][vc_tabs][vc_tab title=”About This Project” tab_id=”1402713028-1-39e9a4-2f88123b-77946048-9294925e-bc34″][vc_column_text]

    HTML5 is ramping up to become a more and more robust markup language. So flex your code monkey muscles and lets make an HTML5 photo booth application.

    [/vc_column_text][vc_button title=”View Demo” target=”_self” icon=”none” size=”btn-huge” href=”http://www.tinkernut.com/demos/343_photobooth/photobooth.html”][/vc_tab][vc_tab title=”Code” tab_id=”1402753910272-3-8123b-77946048-9294925e-bc34″][vc_button title=”Download Code” target=”_blank” icon=”none” size=”btn-huge” href=”http://www.tinkernut.com/demos/343_photobooth/343_photobooth.zip”][vc_column_text]

    What you should already know

    Before starting this tutorial, it is assumed that you already know the basics of web development. This includes, HTML, CSS, Javascript, and HTML5. Without a basic understanding of these languages, it will be very difficult to understand the logic used to make this program work. So, as a prerequisite, it is recommended that you view these tutorials on the basics of web development before continuing.

    1. HTML Basics
    2. CSS Basics
    3. Javascript Basics
    4. HTML5 Basics

    Needed Tools

    Programming with web languages requires very little extra software. You only need three things:

    1. A text editor (I recommend Notepad ++)
    2. A compiler (Any web browser that supports HTML5 will do)
    3. A web server (A good free web server service is 000webhost)

    Demo and Download

    The code

    photobooth.html

    This is the full code that should be saved as photobooth.html and uploaded to your web server.

    <html>
         <head>
              <title>My Photo Booth</title>
         <head>
         <body>
              <center>
              <video id="webcam" width="200" height="200"></video>
              <br>
              <input type="button" id="snapPicture" value="Snap A Picture!" />
              <p> 
              <canvas id="capture" style="display:none;"></canvas>
              <img id="canvasImg" alt="right click to save">
              <script src = "script_photo.js"></script>
              </center>          
         </body>
    </html>


    script_photo.js

    This is the code for script_photo.js. This should be uploaded to your web server in the same direcotry as photobooth.html

    var photoButton = document.getElementById('snapPicture');
    photoButton.addEventListener('click', picCapture, false);
    
    navigator.getUserMedia ||
         (navigator.getUserMedia = navigator.mozGetUserMedia ||
         navigator.webkitGetUserMedia || navigator.msGetUserMedia);
    
    if (navigator.getUserMedia) {
              navigator.getUserMedia({video:true,audio:false}, onSuccess, onError);
         } else{
              alert('Your browser isn't supported');
    }
    
    function onSuccess(stream) {
         vidContainer = document.getElementById('webcam');
         var vidStream;
         if (window.webkitURL){
              vidStream = window.webkitURL.createObjectURL(stream);
              }else{
                   vidStream = stream;
         }
         vidContainer.autoplay = true;
         vidContainer.src = vidStream;
    
    }
    
    function onError(){
         alert('Houston, we have a problem');
    }
    
    function picCapture(){
         var picture = document.getElementById('capture'),
              context = picture.getContext('2d');
    
         picture.width = "600";
         picture.height = "400";
         context.drawImage(vidContainer, 0, 0, picture.width, picture.height);
    
         var dataURL = picture.toDataURL();
         document.getElementById('canvasImg').src = dataURL;
    }


    [/vc_column_text][/vc_tab][vc_tab title=”Important Links” tab_id=”1402753981900-3-10123b-77946048-9294925e-bc34″][vc_column_text]

    Important Links

    • HTML Basics – http://www.youtube.com/watch?v=6Ct6emxVR9w
    • Javascirpt Basics – http://www.youtube.com/watch?v=TLjJM-CsOIs
    • HTML5 Basics – http://www.youtube.com/watch?v=lZVFUQOCQWI
    • Free Webhost for testing

    Help support my channel: http://www.patreon.com/tinkernut

    Follow Tinkernut!

    • Google +
    • Facebook
    • Twitter

    [/vc_column_text][/vc_tab][/vc_tabs][/vc_column][vc_column width=”1/3″][/vc_column][/vc_row]

  • Identify Faked Photos

    April 7, 2012 // davisde // Multimedia Tips Tags: computer, digital, fake, forensics, help, hidden, image, photo, photography, photoshop, Pic, spy, technology 14 Responses


    Want to know if a photo has been faked in Photoshop? Here are some tips to help you find out the truth.

    Links used in this video:
    www.fotoforensics.com

  • Make A Cheap Jumbotron

    March 22, 2011 // davisde // Multimedia Tips Tags: cell, junk, lcd, photo, screen, tinkernut, tips, tricks, tutorial, tv 2 Responses


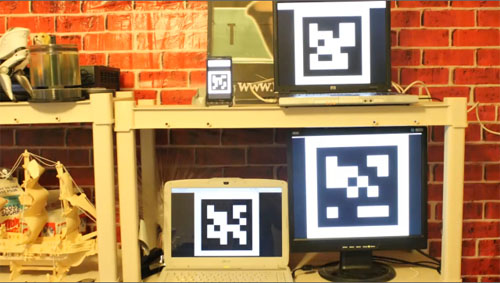
    This video shows you how you can make a cheap multi-screen jumbotron that will let you view pictures.

    Links used in this video:
    http://jumbotron.media.mit.edu

  • Magic Christmas Cube

    December 14, 2010 // davisde // DIY Projects Tags: christmas, create, cube, diy, holidays, photo, simple 1 Response


    Need a quick, simple gift idea for the holidays? Why not make a magical photo cube? This video covers the simple step-by-step process for making one of your own!

    Download the photo layout template:
    http://www.tinkernut.com/demos/266_christmas/mcc_layout.psd

  • Howcast & Tinkernut: How To Make An Adobe Flash Photo Gallery

    July 27, 2009 // davisde // Howcast & Tinkernut, Multimedia Tips, Programming Tips Tags: actionscript, adobe, flash, Howcast & Tinkernut, photo, picture, pictures, programming, tinkernut, tips, tricks, tutorial, web 8 Responses


    How To Create an Adobe Flash Slide Show on Howcast

    Don’t just send people a stack of static photo files; share them in style by creating a photo gallery in Flash.

  • Put Yourself In Time Square

    March 10, 2009 // davisde // Cool Websites, Multimedia Tips, Web Tips Tags: add, fake, fun, photo, picture, time, tips, write 3 Responses


    This video shows you how you can add your own pictures and text to different magazines, billboards, are galleries, etc. This fun and free service is offered by:

    http://www.writeonit.org

  • Make Your Photos HUGE

    July 1, 2008 // davisde // Cool Websites, Video Tags: art, camera, diy, freeware, multimedia, photo, picture, resize, tips, tricks, tutorial 1 Response


    This video introduces the website www.blockposters.com that allows you to turn a regular sized photo into a printable poster.

  • Turn Pictures Into Posters For Free

    June 3, 2008 // davisde // DIY Projects, Multimedia Tips, Software Tips Tags: art, camera, diy, freeware, multimedia, photo, picture, resize, tips, tricks, tutorial 1 Response


    This tutorial will show you how you can convert a regular sized picture into a printable, multi-page poster using free software.

  • Multimedia Tip: Stitch Photos Together

    May 21, 2008 // davisde // DIY Projects, Multimedia Tips, Software Tips Tags: edit, panoramic, photo, photography, pictures, tip 1 Response


    This video covers how to stitch consecutive photos together to make one large panoramic shot using a free program called Autostitch

  • Cool Websites: Make your pictures funkier

    April 19, 2008 // davisde // Cool Websites, Video Tags: cartoon, cool, photo, picture, warp, website 1 Response


    Cartoonize and warp your pictures using the tools at Befunky.com